
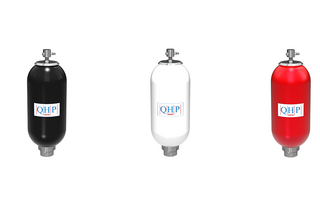
Welcome to QHP Founded in 1987, QHP is a worldwide leader of Oil and Gas Accumulators and Compensators
QUALITY HYDRAULIC POWER
QHP is part of the HYDAC Group who are the world’s leading manufacturer of gas loaded Bladder, Piston and Diaphragm Accumulators, offering both standard and bespoke Accumulators. QHP is the leading manufacturer of Oil and Gas Accumulators and Subsea Compensators.
Our wide experience and reputation for innovation and customer care has earned us a world class customer base, while our technical solutions to specific customer applications has allowed us to develop a unique market skill for specialising in and customising any Oil and Gas product to meet individual needs.
We can offer accumulation for almost every Oil and Gas application. Although our core business is Oil and Gas our experience and know how in Accumulators allows us to manufacturer for many different industries and applications.
Please see our capabilities and product sections for more information.
See more about QHP below
Why QHP is the stand-out market leader

A Clear Direction
Our strategy is simple, putting both our customers and employees at the heart of everything we do.

Our Purpose
Is to provide our customers with the best solutions to meet their needs.

Our Vision
Is to provide the highest quality products possible, whether it be bespoke or standard solutions.

Our Strategy
Is to continue to grow market share globally by retaining existing customers, finding new customers and working closely with our sister company Hydac. We will offer the most complete range of products available supported by a total commitment to continuous improvement and the total commitment of our outstanding employees towards the long-term success of our customers. This is what really makes us stand out from the competition.
Who are our Customers
Subsea Production Systems
We are partners with all of the GLOBAL Subsea Tree, Control Systems and Manifold providers.
Mechanical Seal Systems
We are partners with all of the GLOBAL manufacturers of Fluid Control System providers.
Topside Control Systems and Process Packages
We are partners with all of the major HPU and WOCS providers.
Middle East
We are partners with all of the major OEM’s who supply some of the largest oil companies in the world, based in the region.
Other sectors
Where we provide a large number of bespoke, complex applications and standard products. From our manufacturing facilities in the UK we ship over 70% of our products globally to our loyal customers.
Our Competitive Edge

Our People
This is the keystone of our competitive edge. Highly qualified, customer orientated, entrepreneurial and totally dedicated to providing customer solutions.

Our Customers
The longevity of our customer relationships is a direct product of the trust they place in our people, and the value we deliver from our technical capabilities. With our scale and expertise, we offer unrivalled access for both global and local partnerships. Putting our people at the heart of everything we do ensures that business is always personal. Our commitment to listen, learn and provide allows us to offer the very best customer focussed solutions and services.

Our Market Opportunity and Offerings
With over 36 years’ experience manufacturing accumulators, we have brought in many of the key processes in-house such as: Welding, Painting, Flushing, Machining, Qualification Testing allowing us to have total control of our product quality. As a result, we have the broadest and deepest technical offerings in the market, positioning us as the partner of choice for even the biggest and most complex solutions.

Our Financial Strength
In a world of risk and leverage, we are proud to be different. We are completely debt free and retain a strong balance sheet providing strategic agility and high liquidity. We are also part of the HYDAC Group, who are 100% committed to our business model. We reinvest all of our returns back into our business, to support our customers aspirations long into the future. We have a sustainable business plan, to support our customers long into the future.
Our Qualifications
- Long established mature ISO 9001 quality assurance system.
- Occupational health and safety standard, ISO 45001.
- Environmental standard ISO 14001.
- ISO 3834-2 for ‘quality requirements for fusion welding of metallic materials.
- Investors in People accreditation.
- PED, ASME U Stamp, ASME R Stamp, DNV, ABS, Worksafe, DOSH, CRN and many more approvals.
We quite simply have the most experience and expertise in this industry to support our customers.
Today, we have over 1,000 years of cumulative experience. All of our employees are highly qualified, expertly trained and vastly experienced.


